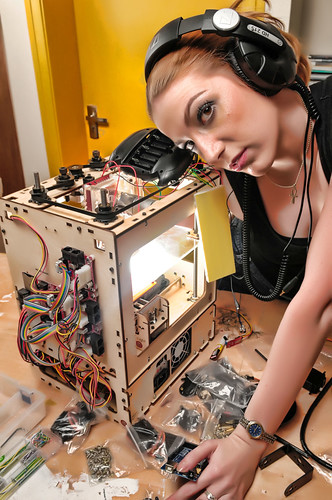
March 14th, 2011 § § permalink
I shoot this a while back to promote Hackerspace but never get around to publish it. Strobist is the tinker of light and the hacker among photographers.
Some strobist setup info here:
- SB-600 inside the makerbot
- SB-800 on shoot-through umbrella to the camera right


]]>
March 14th, 2011 § § permalink
March 14th, 2011 § § permalink
新车间搬家了哦!
经过在 新单位二楼三个月的孵化后,新车间成长了,要飞了。在安化路和江苏路的老工厂里面找到了一个100平米的新场地,新车间现在真的在工厂里面了。应该在三月底就会装修好。欢迎大家来玩。
Lovely neighborhoold
There are all kind of business around. I am sure we can use them in our making.

Yes, it’s a real factory (che jian)!

Let the be light
One big side of the room is full of window.

Plenty of space

]]>
March 13th, 2011 § § permalink
XinCheJian was in Barcamp Shanghai!
We took the Green for the afternoon to talk about Hackerspace, Maker, Open Source Hardware and of course ROBOTS!!! 😉

The crazy robot car David was carrying around at Barcamp
The robot was built the night before barcamp with YM4 from Embedream, Arduino Uno and a HC-SR04. The little YM4 is a lot of fun. The independently controlled wheels allowing the car to turn on a fix axis and this saves the use to savor to turn the limited angle SR04 around to inspect the environment. But at 3AM, it was discovered a little drawback of controlling two independent wheels while trying to make the it going straight. Well, it was 3AM so I decide to let it acts a little crazy. I am dedicating this crazy robot to the crazy Shanghai taxi driver who took me to the barcamp in the morning! I will name it 840. 😉

Pitching Hackerspace
Kicking off the afternoon with pitch of Hackerspace and Maker Culture

Hmm, this is why the call this session “THE GREEN.” Get to make fun of making is much more fun then golf as hobby.

HCR, the open source robots from DFRobot
Rick Ye gave a talk on his open source HCR robot. I was driving it around to round up people to the talk. This version has a cam pointing upward and a automated navigation mode. It’s a lot of fun to watch it walking all over the place on its own from the video at the control.

This little guy has great potential to be a good caddy on the green.

Video of HCR
Thanks to Scott for the video.
]]>
March 5th, 2011 § § permalink
#ym4-arduino-uno img
{
margin:5px;
padding:5px;
display:block;
}
Another weekend night of hacking fun hooking up a Arduino Uno with YM4 robotic car from EmbeDream. The YM4 is a well designed FIRA compliant robot car with built in power supply. The left and right wheels are controlled independently and the built in feedback from wheels.
The break out board for the YM4 is easy to work with. The H-bridge control are CT1, CT2, and CT3. CT1 control the speed with PWM and CT2/CT3 decide the direction of the wheel. This is the same configuration for both wheels. The following is a quick sketch to get YM4 going forward.
#define RIGHT_CTRL_1 5
#define RIGHT_CTRL_2 6
#define RIGHT_CTRL_3 7
#define LEFT_CTRL_1 11
#define LEFT_CTRL_2 12
#define LEFT_CTRL_3 13
void setup()
{
 pinMode(RIGHT_CTRL_2, OUTPUT);
 pinMode(RIGHT_CTRL_3, OUTPUT);
 pinMode(LEFT_CTRL_2, OUTPUT);
 pinMode(LEFT_CTRL_3, OUTPUT);
}
void loop()
{
  digitalWrite(RIGHT_CTRL_2, 0);
  digitalWrite(RIGHT_CTRL_3, 1);
  analogWrite(RIGHT_CTRL_1, 128);
  digitalWrite(LEFT_CTRL_2, 0);
  digitalWrite(LEFT_CTRL_3, 1);
  analogWrite(LEFT_CTRL_1, 128);
}
Now, the TODO list
- Find a more secure way to protect the Uno board and protect it from bumping into objects when robot start to run
- Figure out how and where to attach sensors: ultrasonic distance and infra red for distance and obstacle sensing


]]>
February 28th, 2011 § § permalink
@theliuyan just posted a few pictures from the Sunday’s Cub Scout event. It was fun to introduce some hardware hacking to cub scouts. I think they enjoyed it with their great group of supportive parents. Just put Tiger Mom on the title for SEO. 😉 The activity is part of their scout engineering and we were making Electronics Dice.


]]>
February 27th, 2011 § § permalink
Got a chance to introduce Arduino to the boy scout at YCIS. It was a fun afternoon working with the boys and the parents. Here are more on the design of the electronic dice. Look forward to seeing the boys completing the system next week.
The tool used to design the dice is Fritzing. It’s an open source design program for interactive electronics. The functionalities of the dice is pretty straight forward: when the button is press, the LEDs start to flash and on the release of the button, one of the LED is randomly picked.


Arduino is used to drive the dice logics. Arduino is a popular open source microcontroller for building interactive electronics. It comes with an easy-to-use IDE that can be downloaded here.

The complete program of the dice is here. Just connect up the Arduino board to the computer using the USB cable and launch the IDE to upload the program. Would be fun to see some tinkering with the program to provide different behavior of the dice.
#define RANDOM 1
#define PICKED 2
#define BOUNCEDELAY 50
int state;
void setup()
{
  pinMode(7, INPUT);
  pinMode(2, OUTPUT);
  pinMode(3, OUTPUT);
  pinMode(4, OUTPUT);
  state = 1;
  Serial.begin(9600);
}
int reading = 0;
int button = 0;
int last_button = 0;
int picked = 0;
void loop()
{
  if (state == RANDOM) {
    digitalWrite(2, HIGH);
    digitalWrite(3, LOW);
    digitalWrite(4, LOW);
    delay(50);
    digitalWrite(2, LOW);
    digitalWrite(3, HIGH);
    digitalWrite(4, LOW);
    delay(50);
    digitalWrite(2, LOW);
    digitalWrite(3, LOW);
    digitalWrite(4, HIGH);
    delay(50);
  } else if (state == PICKED) {
    digitalWrite(2, LOW);
    digitalWrite(3, LOW);
    digitalWrite(4, LOW);
    digitalWrite(picked, HIGH);
  }
  reading = digitalRead(7);
  if (reading == last_button) {
    button = reading;
  } else {
   last_button = reading;
  }
  if (button == 1) {
    state = RANDOM;
  } else {
    state = PICKED;
    if (button != last_button) {
      picked = random(3) + 2;
    }
  }
}
]]>
February 25th, 2011 § § permalink
We received visitor from Nanjing based EmbeDream today. The gust come bearing gift of their open source FIRA bot. It’s of great design and I can’t not wait to try to hook it up to Arduino to have some fun! Here are some photos of the bot.
It’s small cube.

Take apart one side


]]>
February 7th, 2011 § § permalink
I have been playing around with OpenBlocks. It’s a very flexible environment to create a new block language. When it comes to design one for Arduino, I found myself wondering between two different styles of design.
Design I
The first design is of course to follow the Arduino Language Reference closely. However, the resulting block language seems to be a bit too “verbose?” Or should I say “busy” since it’s really a graphical representation of the textual program. Here is a sample of what it looks like for the equivalence of codes here.
void setup() {
  pinMode(1, INPUT);
  pinMode(2, OUTPUT);
}
void loop() {
  if (digitalRead(1) == HIGH) {
    digitalWrite(2, LOW);
  }
}

Design II
Since the block language is targeted at the beginner of Arduino and programming, most of time, we talk about “When the button on pin 1 is pushed, I want the LED on pin 2 to light up.” There is a much natural way to map this statement into an intuitive block language by building the blocks around the pin. Here is how it may look like:

This language is more concise and easier to understand. The language itself should provide enough meta info to infer the setup codes. However, in order to do this, the language may need a little runtime (OS?) to be compiled along with the Sketch but it seems to be worth the effort.
The OpenBlocks codes I am playing around with the idea is available at my ‘ant’ branch openblocks on github. Appreciate any feedback on this.
]]>
February 5th, 2011 § § permalink
To make Arduino easier for non-programmers, I decided to start a visual programming environment similar to Scratch for Arduino.
Similar Projects around the Web
Modkit is a similar project but at the time I wanted to start the project, it was in a closed alpha. Also, it seems that modkit is going to be proprietary and I want an open source VPL for Arduino. By the way, Modkit CrimpCards is an awesome idea and design.
S4A (Scratch for Arduino) is another interesting project but it’s for using Scratch with Arduino instead of programming for Arduino.
David Mellis over at MIT Media Lab also has a project called “Scratch for Arduino” but no detail yet. David is also one of the creator of Arduino platform.
Arduino IDE and OpenBlocks
Fork the source of Arduino IDE hosted on github to host my version here. Next stop is to find a library for the visual programming. I found a project called OpenBlocks developed as part of the MIT StarLogo NG. Open Blocks is also used in Google’s Android development tool App Inventor.
Both Arduino IDE and Open Blocks are written in Java so the integration should be smooth. Since I have done by share of Java, I decided to also use this opportunities to look into a few alternative languages running on JVM to implement this. Since I have done mostly Ruby for the past few years, JRuby looks pretty good. The language I really want to use is Clojure but it seems it’s a bit tricky to use it embedded in a Java app. Will give both a try and see how it goes.
Let the hacking beging!
Hopefully, we will have a running version in the next few weeks.
]]>