XinCheJian and The Great Global Hackerspace Challenge!

March 22nd, 2011 § 0 comments § permalink

element14.com提供的人民币5900元(约合900美元)赞助费作为购买零件(包括必需的微型控制器和便携式动力装置)的预算支出。 每家参赛的黑客空间都会收到10件焊接装置,而进入半决赛却未获得冠军的三家选手各将得到价值不低于人民币13000元(约合2000美元)的电子工具。获胜的参赛选手将获得价值在人民币36000元(约合5600美元)以上的Tektronix MSO2024示波器一台。作为额外奖励,进入半决赛的选手都将被邀请参加2011年度在加州举行的Maker Faire大展。 为迎合GGHC大赛宗旨,新车间将目光投向那些还在接受初等教育的孩子,希望让他们了解到通过合作以及打破传统思维从而解决问题的绝佳途径。这样寓教于娱乐的方式可以使孩子与学习的关系更为互动,并且鼓励了他们投入到更多样的挑战中去。 想要加入或是给我们的团队提供帮助?请致邮到[email protected]。 想联系大赛组织者请致邮[email protected]。]]>

Building Quadcopter

March 22nd, 2011 § 1 comment § permalink

“山寨”四旋翼

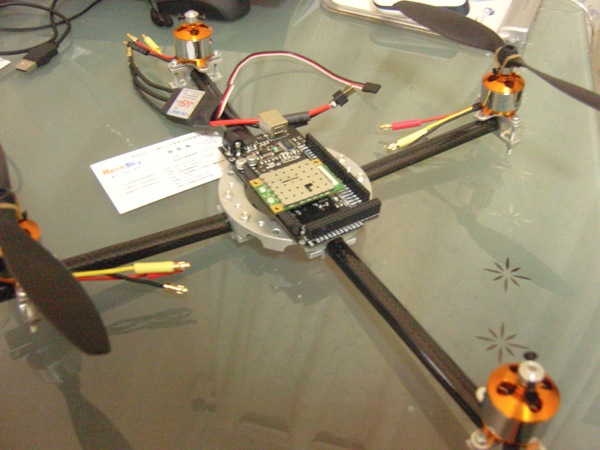
从新车间一开始,就有不少的朋友对做四旋翼有兴趣,我们成立了一个四旋翼小组考虑如何能用在上海买的到的零件做一台四旋翼。

做骨架

第一次的尝试是很山寨的,找了一家做窗户的,切了几个50cm的铝条。不是很成功,中间的架子的设计还是蛮有挑战的。


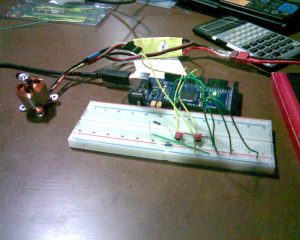
电机和Arduino

电机当然就是上淘宝淘了,用一般航模电机。花了一些时间调通Arduino.

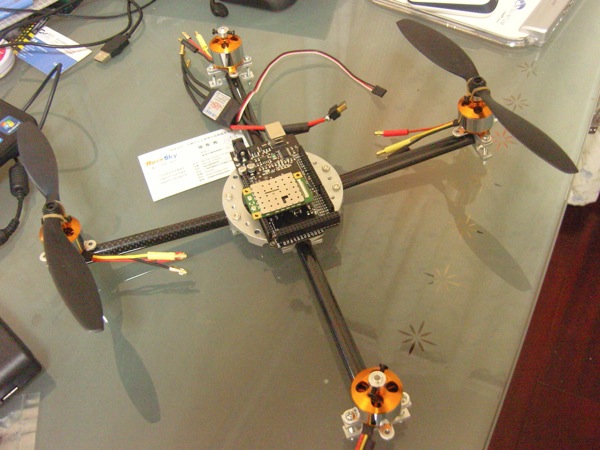
更好的骨架

东光找了一个朋友设计了一个铝和碳纤的骨架,非常的酷。有了这个骨架和电机,接下来就是剩下的传感的设计,希望在未来几个月内可以飞起来。

]]>

Opening Speaker profiles: RoboPeak

March 21st, 2011 § 0 comments § permalink

上海的RoboPeak

非常高兴上海 RoboPeak 机器人研发团队会在 3/26的活动 上为我们带来演说。非常期待。

从他们的网站上:

RoboPeak是国内由一群软件工程师、电子工程师、新媒体艺术家所组成的机器人及相关技术领域的设计研发团队,团队于2009年底创建。 团队致力于民用机器人平台系统、机器人操作系统(ROS)以及相关设备的设计研发,并尝试将日新月异的机器人技术融入人们的日常生活与娱乐当中。同时,我们将尽力为机器人技术在开源硬件、开源软件社区的普及做出贡献。 团队在嵌入式系统、系统级软件/固件、图像识别等领域拥有丰富的经验,拥有独立设计,开发机器人操作系统、相关传感器设备硬件/固件的能力。

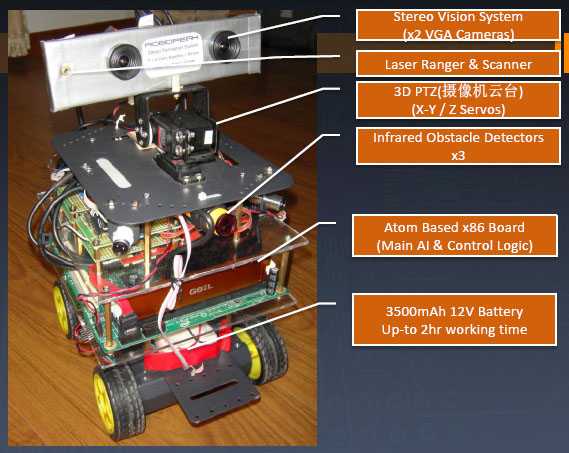
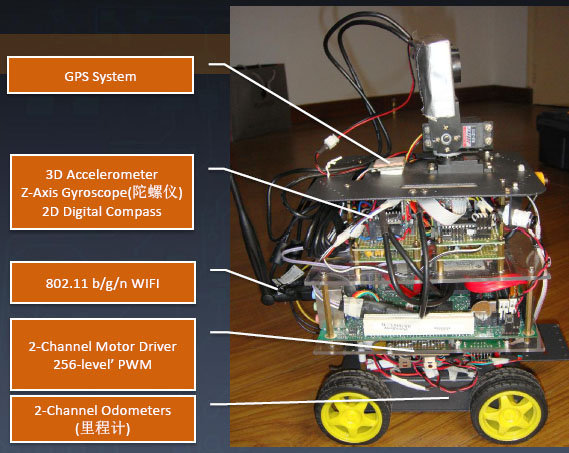
这个团队在机器人和Arduino上做了相当多开发,详细的情况可以查看他们的博客.底下的图片来自他们的博客,看起来相当有趣的机器人设计,期待周六和他们见面。

Rp intro 001

Rp intro 002

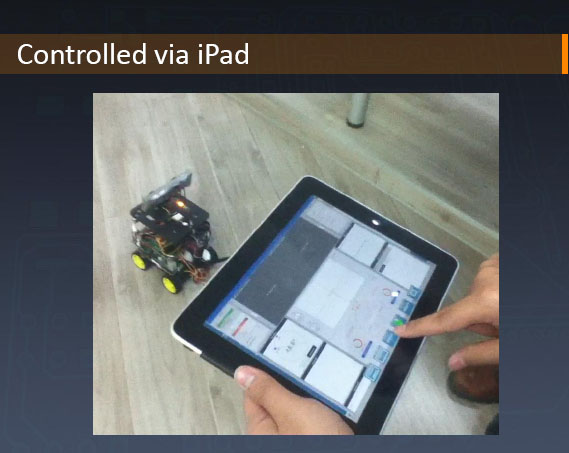
iPad 遥控

Rp intro 005

]]>

Hackerspace in Shanghai: Our Maker Neighbors

March 19th, 2011 § 0 comments § permalink

XinCheJian’s Neighborhood

I have recently been asked quite a lot of questions about hackerspace, hacker culture and impact of hackerspace in China. This has gotten me starting to think a lot about what it means to run a hackerspace. I decided to take a walk around the neighborhood and find anything that’s related to makers. The following pictures are shops with in 500 meters of our new location in Anhua Lu. It’s a typical Shanghai neighborhood and quite interestingly how many maker related shops are around us.

Welding on the street

Bike modding? The guy is attaching a new rack to the back of the bike to carry more goods.

IMG 0373

Window Frame Maker

They got good collection of aluminum windows frame and can cut it to any size we want.

IMG 0376

Glass shop

IMG 0377

Cotton Shop

This is a surprise fouind.

IMG 0378

Lock Smith

IMG 0374

Hardware Store

Quite a collection of home improvement materials

IMG 0379

Home Appliance Repair

Also sell used home appliances. Will for treasure hunt one of these days.

IMG 0380

]]>

Quadcopter Frame ready!

March 15th, 2011 § 2 comments § permalink

We have the FRAME!!!

Danny show up in Barcamp with a big surprise! He show me the fiber/aluminium frame of the quadcopter he just got CNCed. What a beauty!

SNC18108

SNC18109

]]>

Beauty and Makerbot

March 14th, 2011 § 0 comments § permalink

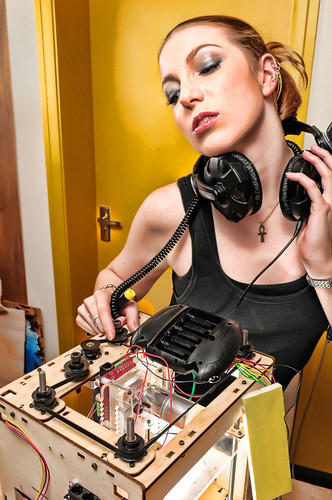
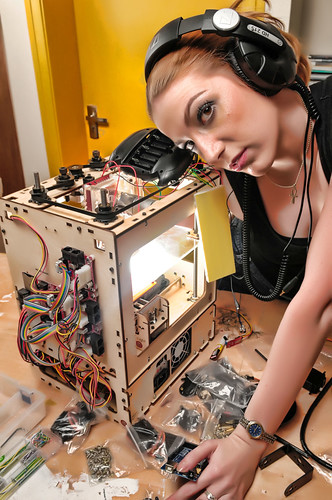
I shoot this a while back to promote Hackerspace but never get around to publish it. Strobist is the tinker of light and the hacker among photographers.

Some strobist setup info here:

- SB-600 inside the makerbot
- SB-800 on shoot-through umbrella to the camera right

Beauty and Makerbot

Beauty and Makerbot

Beauty and Makerbot

]]>

Viva la Loongson for Cuba

March 14th, 2011 § 0 comments § permalink

对不起,此内容只适用于美式英文

New Home of Xin Che Jian

March 14th, 2011 § 6 comments § permalink

新车间搬家了哦!

经过在 新单位二楼三个月的孵化后,新车间成长了,要飞了。在安化路和江苏路的老工厂里面找到了一个100平米的新场地,新车间现在真的在工厂里面了。应该在三月底就会装修好。欢迎大家来玩。

Lovely neighborhoold

There are all kind of business around. I am sure we can use them in our making.

IMG 0352

Yes, it’s a real factory (che jian)!

IMG 0363

Let the be light

One big side of the room is full of window.

IMG 0348

Plenty of space

IMG 0346]]>

XinCheJian, Hackerspace, Robots, and HCR at Barcamp Shanghai

March 13th, 2011 § 1 comment § permalink

XinCheJian was in Barcamp Shanghai!

We took the Green for the afternoon to talk about Hackerspace, Maker, Open Source Hardware and of course ROBOTS!!! 😉

IMG 0086

The crazy robot car David was carrying around at Barcamp

The robot was built the night before barcamp with YM4 from Embedream, Arduino Uno and a HC-SR04. The little YM4 is a lot of fun. The independently controlled wheels allowing the car to turn on a fix axis and this saves the use to savor to turn the limited angle SR04 around to inspect the environment. But at 3AM, it was discovered a little drawback of controlling two independent wheels while trying to make the it going straight. Well, it was 3AM so I decide to let it acts a little crazy. I am dedicating this crazy robot to the crazy Shanghai taxi driver who took me to the barcamp in the morning! I will name it 840. 😉

IMG 0078

Pitching Hackerspace

Kicking off the afternoon with pitch of Hackerspace and Maker Culture

IMG 0093

Hmm, this is why the call this session “THE GREEN.” Get to make fun of making is much more fun then golf as hobby.

IMG 0096

HCR, the open source robots from DFRobot

Rick Ye gave a talk on his open source HCR robot. I was driving it around to round up people to the talk. This version has a cam pointing upward and a automated navigation mode. It’s a lot of fun to watch it walking all over the place on its own from the video at the control.

IMG 0106

This little guy has great potential to be a good caddy on the green.

IMG 0110

Video of HCR

Thanks to Scott for the video.

]]>

EmbeDream YM4 and Arduino Uno

March 5th, 2011 § 0 comments § permalink

#ym4-arduino-uno img { margin:5px; padding:5px; display:block; }

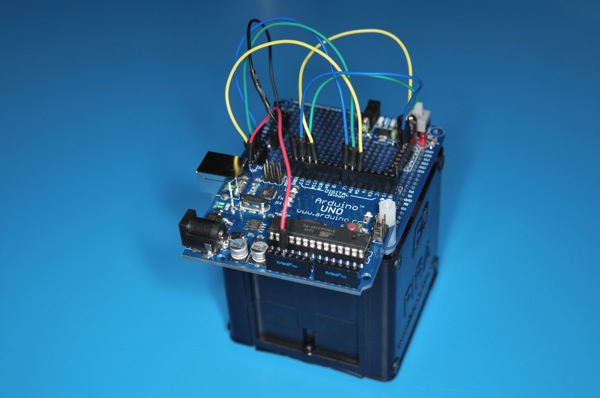
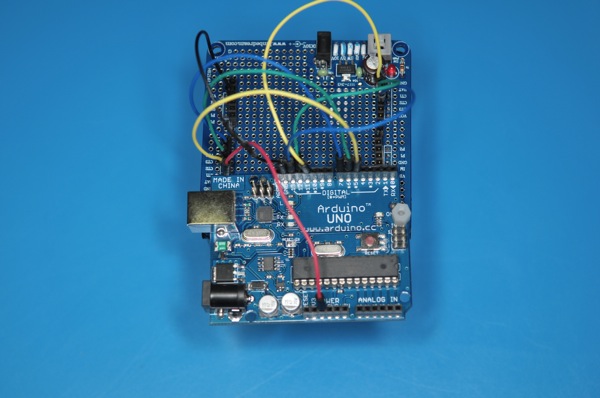
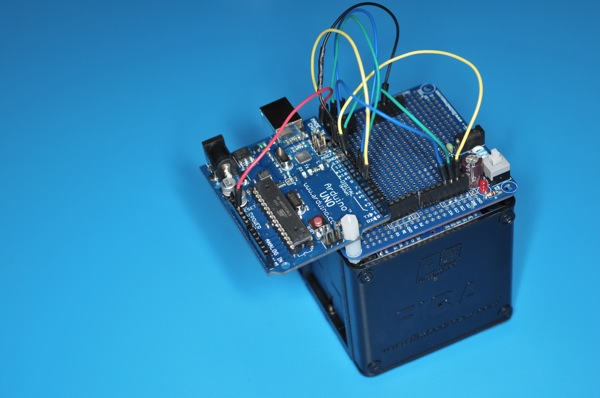
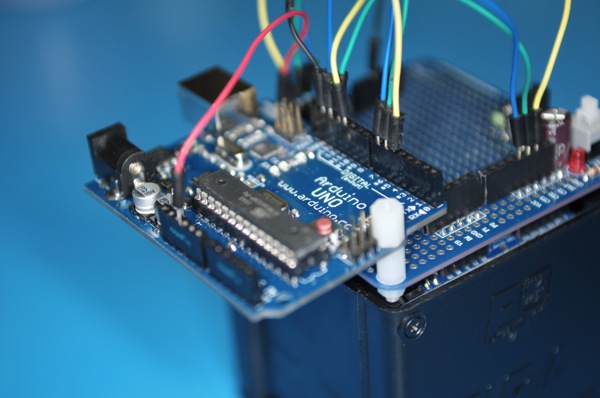
Another weekend night of hacking fun hooking up a Arduino Uno with YM4 robotic car from EmbeDream. The YM4 is a well designed FIRA compliant robot car with built in power supply. The left and right wheels are controlled independently and the built in feedback from wheels.

The break out board for the YM4 is easy to work with. The H-bridge control are CT1, CT2, and CT3. CT1 control the speed with PWM and CT2/CT3 decide the direction of the wheel. This is the same configuration for both wheels. The following is a quick sketch to get YM4 going forward.


#define RIGHT_CTRL_1 5
#define RIGHT_CTRL_2 6
#define RIGHT_CTRL_3 7
#define LEFT_CTRL_1 11
#define LEFT_CTRL_2 12
#define LEFT_CTRL_3 13
void setup()
{
 pinMode(RIGHT_CTRL_2, OUTPUT);
 pinMode(RIGHT_CTRL_3, OUTPUT);
 pinMode(LEFT_CTRL_2, OUTPUT);
 pinMode(LEFT_CTRL_3, OUTPUT);
}
void loop()
{
  digitalWrite(RIGHT_CTRL_2, 0);
  digitalWrite(RIGHT_CTRL_3, 1);
  analogWrite(RIGHT_CTRL_1, 128);
  digitalWrite(LEFT_CTRL_2, 0);
  digitalWrite(LEFT_CTRL_3, 1);
  analogWrite(LEFT_CTRL_1, 128);
}

Now, the TODO list

  • Find a more secure way to protect the Uno board and protect it from bumping into objects when robot start to run
  • Figure out how and where to attach sensors: ultrasonic distance and infra red for distance and obstacle sensing
DSC 7415 DSC 7417 DSC 7417 DSC 7417
]]>